Showing posts with label Nail Art Stickers. Show all posts

April 4, 2010

Cutesy


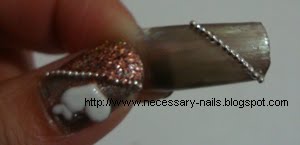
Essie Steel-ing the Scene is a silver bronze metallic color. For the swatch, I used 3 coats, 2 coats is fine but I wanted to cover the white ends of my nails fully. The formula comes out streaky but when you put on top coat (like the swatch picture) the streaks don't show as much as without top coat. It's a very interesting color and I think goes nice with my skintone. :)

For this week, I did a 'cutesy' style.
Base is 3 coats of Essie's Steel-ing the Scene and then I used a clear coat in order to line up the silver beads. I then used clear coat again on the bottom area under the beads so that I could use bronze glitter for that area. I added a heart nail sticker on the area on top of the diagonal beads for my ring fingers and thumbs. For the rest of my fingers, I used nail stickers with bows and small silver/gold chains. :)


I hope you liked this week's nails. :) & until next time♥~,
KATHERINE*

-edit- April 4, 2010
I did a tutorial of the nails & I'd like to talk about Katrina's Nail Blog. She's having her first giveaway and I'm so excited because I've been following her on the Nail Thread from Soompi Forums Beauty&Fashion Forum. I absolutely love her nail art and I think she's really talented. I hope I win the giveaway. Even if I don't, I'm glad that she started posting and created a nail blog so it's easier for me to follow and reference her work.

& here's my tutorial:

1. Prep, base coat and 3 coats of Steel-ing the Scene

2. After it dries, put a top coat on. When it's not fully dry, begin lining up the silver beads from one corner to the other. I started from the end because I wanted to save more beads for future use [lol] but you could also start from the corner of of where your cuticles end.


3. Top coat on the beads diagonally on top so they stay and also top coat on the bottom portion under the beads & sprinkle on bronze glitter or any other glitter you prefer.
4. Seal it with top coat so that no glitter falls out & you could add nail stickers like I did on the top portion, leave it alone or do some nail art.

Hope you enjoyed the tutorial and don't forget to follow Katrina's Nail Blog @ http://katrinasnailblog.blogspot.com.

see you soon,
<3katherine


March 1, 2010

I-HAUL NOT U-HAUL

It's the first day of a new month and what better way for me to celebrate and brighten my day than to receive my China Glaze, Essie and Misa haul! I ordered 16 polishes total and it finally came today! (: I planned to get OPI's and Orly's but I was thinking since this other online beauty supply sold it for cheaper, that I would get it from there. I find out after I ordered the 16 to find that the other supply store didn't have the ones I wanted. So my OPI and Orly haul will be held off for a little bit, but they will come! :(


Misa batch {left to right}
1. Teddy Bear
2. Wishing on a Star
3. Disco Queen
4. Lather, Rinse and Repeat


Essie batch {left to right}
1. Matte About You
2. Pop Art Pink
3. Lilacism
4. Van D'Go
5. Mint Candy Apple


China Glaze batch {left to right}
Four Leaf Clover - Ruby Pumps
Luna - Cleopatra
Techno - Cosmic - Atlantis


-♥-
In addition to ordering from the beauty supply, I visited Yukiumi and they have THE MOST ADORABLE NAIL ART STICKERS so I purchased 5 packs and 3 sets of 20 of little things you put on your nail (strawberries, mandarin oranges and apples). (:


-♥-
I went to Duane Reade and I found these 3 polishes 50% off!
OPI Italian Love Affair
OPI You're a Kabuki Queen
OPI Espresso My Love <- $2.12 instead of $4.25!!!!


Swatches maybe coming soon? (:

February 17, 2010

I {♥} Red - not really but starting to!

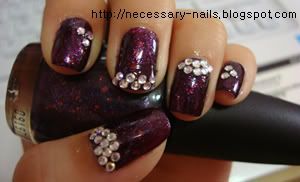
OPI Merry Midnight is so beautiful when even looking at the bottle. The formula was a bit jelly but the end product came out nice. It took me 3 coats of Merry Midnight for this only because I tried to make it even since the first coat was uneven on my nails. I didn't know what else to add so I decided to add rhinestones. For my ring&thumb I did a "reverse tip" full of rhinestones.


-♥-

For this weekend, I especially did my nails to celebrate Valentine's Day & the Lunar New Year with red nails.
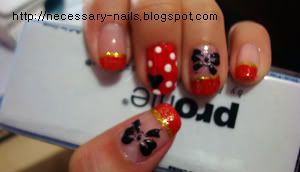
For this occasion I decided to do most of my nails with red tips and gold lining (except my middle fingers).

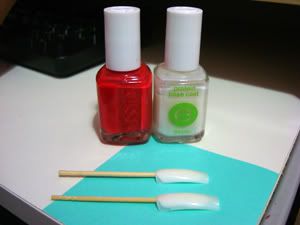
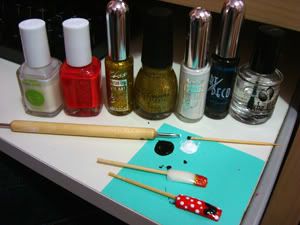
Used:
- Essie Protein Base Coat
- Essie Dramatic Drachmas
- Kiss Nail Art Gold Glitter
- Sinful Colors Paris
- White and Black nail art (because I don't have regular black and white lol)
- Seche Vite Quick Dry Top Coat

1. First after all the regular filing, buffing and cuticle oil procedure, I used my Essie Protein Base Coat to start.

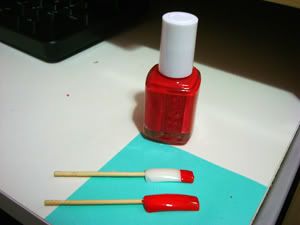
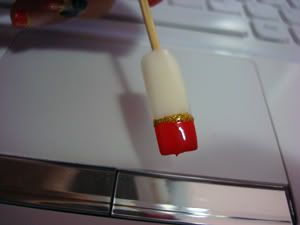
2. After that dried I used Essie's Dramatic Drachmas (you can use any color you'd like) and swiped it on the ends of my nail to make the tip look. Don't worry if it's a little crooked because the gold lining will cover that up!

3. When the tip is dry, make your gold lining with a nail art brush.

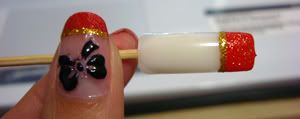
4. I used Sinful Colors Paris to cover the red with little specks of gold glitter. It's not VERY noticeable from far away or if you hold your hands a little far but you could see it when you look closer at it. After it's dried, I sealed it with Seche Vite Quick Dry Top Coat. I recommend this top coat for those who are impatient like I am and it works very well & dries VERY quick! :)


5. For my middle finger, I used 2 layers of Essie Dramatic Drachmas on the whole nail since one of my nail broke and it's too short to have red tips.

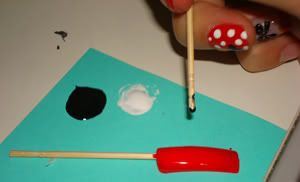
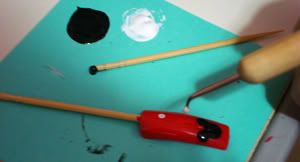
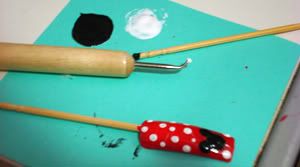
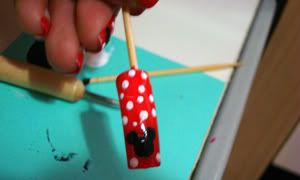
6. After Dramatic Drachmas is dried, use the round flat end of a toothpick and dip it in black to make your minnie mouse.

7. Use another toothpick's round flat end and dip it in white to make the polka dots randomly around the nail and the minnie mouse.

8. Make sure your nail is dry before you put on the Seche Vite Quick Dry Top Coat because it may smear.


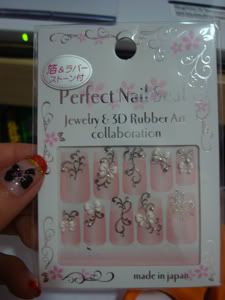
9. I used bows from 3D Rubber Nail Art Stickers on any nail that had the red and gold tips. I also then sealed it with top coat to make sure it stays. (: The picture has less because I used a lot of the bows already, lol. It's just an idea of what stickers if anyone's interested in finding some and purchasing the bows I have. (Another thing is that although the bows are white, I colored my bows black to match the minnie mouse.)


10. End product:


-♥-
I hope this tutorial will make it easier for people to create tips without going to a nail salon and pratice freehand tips.
Hope you enjoyed~
Katherine :)

February 6, 2010

Grown Fond of Sinful Colors

Since the last post, I've realized that I've grown fond of Sinful Colors. Cheap, nice colors & found conveniently at two pharmacies in my neighborhood. Their display collection has grown a lot bigger from what I use to remember. It also makes me feel better about how much I spend on nail polish and it makes up for this time when I'm not ordering Essie's, OPI's and China Glazes online. :D

For the past 1-2 weeks, I did these 2 lovelies:
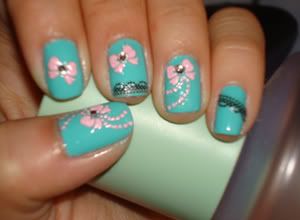
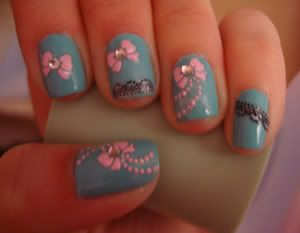
A Classic and my most favorite color: China Glaze For Audrey with Forever21 Nail Stickers (:

I've been wanting to do a manicure of China Glaze For Audrey while I was working and I was thinking, since it's so close to the trademark Tiffany&Co. color, I was thinking of making my nails look like the Tiffany&Co. jewelry box, the aqua-teal color + a white ribbon and bow. So I tried that out, and it didn't work out well, sadly my vision didn't come true. Maybe one day when I get better with nail art T___T;. But since I really love the color, I decided to use it with nail stickers, the next best thing when your vision doesn't come true. Or Konad but I really suck at using it. I bought a box in Vegas and it's been sitting in my room for a while.. maybe I'll resell it or something.

With flash

With no flash


-♥-

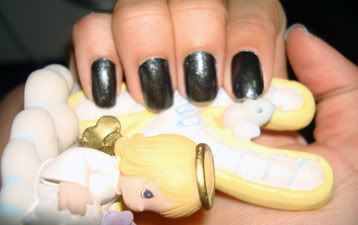
After that I picked up Sinful Colors Secret Admirer. I ABSOLUTELY LOVE THIS POLISH! It's black or close to black with micro silver glitter. This was 2 coats topped off with Seche Vite Quick Dry Top Coat. I absolutely love this manicure. What surprised me more was when I was taking the polish off, the black would come off and you're left with a metallic gray layer which looks AWESOME! I'm in love & I've really come to loveeeeeeeeee Sinful Colors! ♥(:

With flash


-♥-

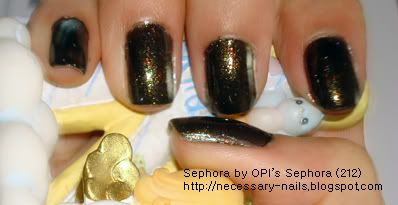
And finally, today I happen to be in Times Square and I stopped by Sephora to look and test out Kim Kardashian's new fragrance, Kim Kardashian. I'm soo in love with the smell that I think I'm going to get myself a bottle :3♥ Also, since I was in Sephora, I decided to take a look at the Sephora by OPI section & I found this baby right here, Sephora by OPI 212 - Sephora. It's a limited edition bottle (and I just read that it's only available online or the Times Square store)! Eek I'm in love and I HAD TO SPEND $9 on that bottle. I rarely spend that much on any bottle I own but I'm definitely in love.


This isn't my picture but I'm going to definitely upload it when I do use this one - which is soon! So look out for a coming post! I'll also add a review & possibly pick up another bottle maybe for back up! Hehe (:
Edit: I did my nails (picture below) with Sephora and I re-enforcing my love for this polish. I can't put the color into words as good as it is, but it's like a brown but with forest green with multi color glitter and gold/orange-ish flakes. I definitely love the color & it was easy to apply. Top coat is a definite need for this one after 2 coats it gets a little bumpy so it'll smooth the bumpiness and make the polish shineeeeeeeeee! I lovelovelovelovelovelove this polish and it's going up to my favorites with (already placed in my favorites) China Glaze For Audrey and Sinful Colors Nail Junkie. :)♥ But the only thing I didn't like was not being able to capture its true color with my camera. The picture below is the best of what I was able to capture close to its true color.

With flash


-♥-

I also saw another bottle that I love Sephora by OPI Too Good For Him - I think I might just have to pick this up also! I'm not 100% sure though, since I feel like I have something like this in my small but growing collection.


-♥-
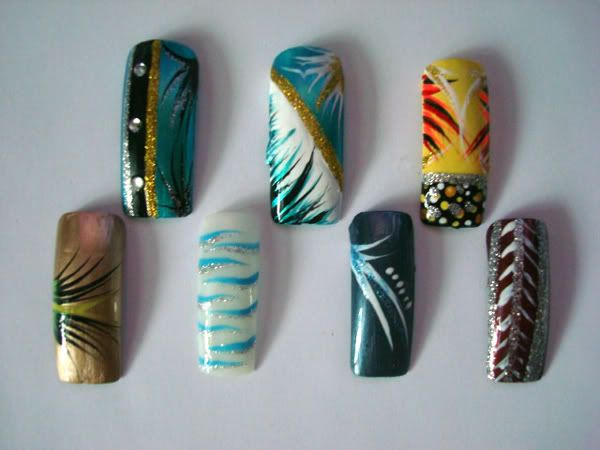
I was looking though my photobucket to see if I uploaded any pictures of when I did my nails and I came across this


I wanted to practice some nail art so I bought fake tips to practice on. There's a variety of colors that I used on this. The only ones I could remember are:
- China Glaze Passion
- Sally Hansen Gunmetal
- OPI Time-less is More
- Essie Sassy Satchel
- China Glaze Solar Power
and a variety of nail art colors.

Sincerely, Katherine♥