April 23, 2010

Stellare Notte from my love, hehe


I wasn't in a great mood on Wednesday. And on Thursday, my boyfriend decided to make me feel better by buying me a bottle of nail polish from Duane Reade. He got me Borghese Stellare Notte! Though it's only one, his intentions made me happier and brought my mood up :)♥. So I decided to swatch it today before I cut my nails since my nails are uneven and I want to grow them back asap! The color is so unique. It's a charcoal with duo shimmer of purple, blue and green. The swatch shows two coats of Stellare Notte with no top coat. It's definitely a beautiful color and a favorite!

Glitter Gradient with Borghese Stellar Notte
& provided tutorial! :)

(1.) prep nails and put base coat on

(2.) two coats of Stellare Notte

(3.) when it's dry and using your silver glitter nail art, make a silver tip. it doesn't matter the size of it, but if you make it at this size the gradient is bigger.


(4.) before it dries and using CoverGirl Boundless Color Disco Dazzle or anything similar, use the brush from the end of the nail and brush on the nail towards your cuticles.

(5.) after it's dry, put your top coat to seal it.

hope you enjoyed the stellare notte glitter gradient & post comments with your gradients :)


~~~
On a side note, I sent out my old nails polishes for the Zoya exchange today! I'm excited to receive the 20 bottles of Zoya I picked out.

have a great day and see you soon!
<3katherine

April 22, 2010

Quest for YELLOW nail polish!

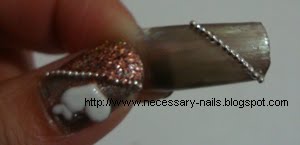
Heart tips on ring finger and french on the other fingers. I couldn't think of another way of describing it, lol. Since I'm a righty, it's easier for me to do the nail art on my left hand rather than the opposite. My nail art isn't as nice on my right hand & the heart isn't as nice looking as my left. The glittler outer part of the heart is thicker than the other side :(. On the bright side, it still looks like a heart.

So after I prepped my nails & applied base coat, I used Essie's Mint Candy Apple. Be careful with this polish because although the color looks nice and the formula is good and thin, the application is tougher than you think because you have to make it equal. Though the first coat might not look equal, be sure to make your second coat equal. I used 2 coats of MCA and then applied a top coat. When it dried, I drew the outline of the heart on the ends of my ring finger, filled in the heart and applied a gold outline over the white heart. Wait until it dries & seal it with top coat again for the finishing touch.

---
Walgreen Mini Haul/Purchase

first swatch picture is 4 coats & no top coat
second swatch picture is 5 coats & no top coat
Rimmel London French Rose. Sheer jelly light pink chiffon - I bought this color because I needed a french manicure/pedicure color. I never tried this brand and the brush size really surprised me, lol. The formula is sheer and the application is smooth. Doesn't dry as fast as OPI, Essie or China Glaze but not bad in terms of waiting for my nails to dry.

Sinful Colors Rise and Shine: 2 coats and 1 coat of top coat
Turquoise with shimmer - reminds me of China Glaze's Tuned Up Turquoise, unfortunately I don't have that bottle anymore so I can't do a comparison swatch - maybe in the future if I remember. The formula was good and the application goes smoothly. The only thing I didn't like was that a lot of nail polish gets on the brush and the rod that holds the brush and there's always a ball of nail polish rolling down from the brush. :\ But it dries quick and when it's dry it looks like a matte polish but looks better with top coat. Love the color & if you're looking for something similar to CG Tuned Up Turquoise, this should be your color. :)

Sinful Colors Mint Apple: 2 coats and 1 coat of top coat
Dusty mint jade with small gold shimmer - similar to Sinful Colors Rise and Shine but just a lighter and dustier shade. Not really that close to Mint Candy Apple although the name is has 2 of the 3 words of it, lol. Good formula and smooth application. Dries fast too! I likey :).

Maybelline Banana Bamba: 3 coats and 1 coat of top coat
lemon/banana yellow with slight shimmer. Two coats is good also but I wanted the color to be even. The formula is good but applying it isn't that good. If your coat is uneven then then it shows in the second and third coat that it's been applied unevenly. Not a bad color, I really like it but I don't think it looks nice with my skintone.

My journey to find a nice yellow polish that would match my skintone is still in progress. I've tried China Glaze Golden Opportunity which didn't work out and the Maybelline Banana Bamba hasn't quite captured me when I look at my hand. :\ Does anyone have any suggestions to a nice yellow? I'm planning on getting China Glaze's Lemon Fizz to give it another shot, hopefully I'll get it soon.

I'm thinking about doing a giveaway when I reach a certain amount of followers on my blog. I haven't picked out what I'm going to give away but definitely new polishes! :) Keep tuning in to check when I will have my first give away!

---


Thanks to Katrina for posting it in her blog! :)♥ Zoya's is having their nail polish exchange this year! I didn't participate last year but this year I'm definitely going to since I don't own a single bottle of Zoya.

So the deal is, for every bottle you want to exchange is $3.50 and in exchange, you get to pick the Zoya nail polishes you want. :) You could pay by credit card, check or money order.

I picked out 20 bottles of old nail polishes that I'm going to exchange for: Ava, Akyra, Charla, Harley, Indigo, Ivanka, Ki, Kotori, Lexi, Luna, Midori, Pippa, Raven, Rea, Richelle, Shivon, Suvi, Trixie, Veruschuka and Zara

I'm excited to try out Pippa because it's YELLOW! And following this blog post, is to continue my quest for the perfect yellow that will fit my skintone!


Anyways, let me know which Zoya's you like or want or thinking about exchanging for! :)
<3katherine

April 16, 2010

Cotton Candy, YUM?


For last week, I swatched OPI Mad as a Hatter. It's clear polish with multi colored micro glitter. For the swatch picture, it took me 3 coats without top coat. I thought that I should put a base color under but when I tried it on a plastic tip to test out, it didn't look as nice. So I kept my swatch for the day and liked it. The colors are so crazy. It's hard to make the glitter cover every area equally though. But very easy to remove. One of my favorites :).

Sephora by OPI Leaf Him at the Alter. Two coats and top coat. Easy application and dries quickly. I don't own any greens like this and I love this color! Shiny and smooth. Not very streaky looking. I added a little yellow nail art also. :)


Today, I stopped by Claire's for earring backings and decided to look at the nail polishes {buy one get one 50% off!}. I fell in love with Fresh Water (right) and I saw the Cotton Candy polish - I was so astonished that someone could make nail polish smell a certain way.

Cotton Candy, 3 coats and no top coat. Very sheer light shimmery blue with micro glitter and circle glitter pieces. You'd probably need more coats in order to cover up the white ends or use this over another color. I love the color though and very easy to apply. :) Oddly, it did smell like cotton candy. But it still had the usual nail polish smell from it also. It's a lot bearable compared to the regular nail polish smell. :\

Fresh Water, 3 coats and no top coat. I absolutely love the bottle color and decided to get it. The formula is sheer but very beautiful. Probably need more coats but still a very nice color. Dries very quick so it won't take up too much time if you do more coats.

Overall both Claire's were sheer and thin, but they dried quick and easily applied. Not bad for Claire's and I'd go back to buy some more to try out. :)

hope you enjoyed this post,
<3katherine

April 4, 2010

Cutesy


Essie Steel-ing the Scene is a silver bronze metallic color. For the swatch, I used 3 coats, 2 coats is fine but I wanted to cover the white ends of my nails fully. The formula comes out streaky but when you put on top coat (like the swatch picture) the streaks don't show as much as without top coat. It's a very interesting color and I think goes nice with my skintone. :)

For this week, I did a 'cutesy' style.
Base is 3 coats of Essie's Steel-ing the Scene and then I used a clear coat in order to line up the silver beads. I then used clear coat again on the bottom area under the beads so that I could use bronze glitter for that area. I added a heart nail sticker on the area on top of the diagonal beads for my ring fingers and thumbs. For the rest of my fingers, I used nail stickers with bows and small silver/gold chains. :)


I hope you liked this week's nails. :) & until next time♥~,
KATHERINE*

-edit- April 4, 2010
I did a tutorial of the nails & I'd like to talk about Katrina's Nail Blog. She's having her first giveaway and I'm so excited because I've been following her on the Nail Thread from Soompi Forums Beauty&Fashion Forum. I absolutely love her nail art and I think she's really talented. I hope I win the giveaway. Even if I don't, I'm glad that she started posting and created a nail blog so it's easier for me to follow and reference her work.

& here's my tutorial:

1. Prep, base coat and 3 coats of Steel-ing the Scene

2. After it dries, put a top coat on. When it's not fully dry, begin lining up the silver beads from one corner to the other. I started from the end because I wanted to save more beads for future use [lol] but you could also start from the corner of of where your cuticles end.


3. Top coat on the beads diagonally on top so they stay and also top coat on the bottom portion under the beads & sprinkle on bronze glitter or any other glitter you prefer.
4. Seal it with top coat so that no glitter falls out & you could add nail stickers like I did on the top portion, leave it alone or do some nail art.

Hope you enjoyed the tutorial and don't forget to follow Katrina's Nail Blog @ http://katrinasnailblog.blogspot.com.

see you soon,
<3katherine